How to organize emails for a clean inbox (7 steps)
Email organization can be a tiresome task, but we are here to help. Discover the Tuta Team’s seven steps to sort emails and keep your inbox neat and tidy.
Email organization in 7 quick steps
-
Step 1: Start with a clean slate: Open a mailbox with Tuta Mail
-
Step 2: Create email alias addresses in Tuta for different purposes
-
Step 3: Create folders & subfolders
-
Step 4: Update your accounts’ email addresses & inform contacts of your new address
-
Step 5: Go through your old mailbox & export important emails
-
Step 6: Import your emails into Tuta Mail
-
Step 7: Set up inbox rules & move emails automatically to folders
Email organization step-by-step guide
Step 1: Create a new mailbox
The thought of having to clean up an email account you’ve had for a couple of years might be enough to keep postponing the task. This is understandable, as for many people, the amount of email, spam, and newsletters received every day is often unmanageable. But an organized mailbox starts with a clean slate!
And while popular email providers like Gmail and Outlook do offer folders, filters, and rules, which are useful for organizing emails - these email providers are now introducing AI features in email which is a big risk for your privacy. Plus, major email services like Yahoo and Gmail are often full of ads which hinder your mailbox organization and order. And these big tech providers do not make creating alias email (which are necessary for organization) addresses a quick and easy task.
The first step to organizing your mailbox is to start with a clean slate. Tuta Mail is the perfect email solution for those who value privacy and want an inbox that’s neat and organized. Tuta Mail offers a range of personal and business plans to best suit your needs.
In order to truly organize your mailbox, we’d recommend a fresh start by creating a brand new mailbox with Tuta Mail - the encrypted Gmail alternative. While creating a new mailbox might seem like a big effort, Tuta Mail’s easy-to-use design and features like email import and aliases make it easy – and even better, you will receive a lot less email spam, newsletters, and promotional mail, without having to manually unsubscribe from all these lists that have accumulated over the years.
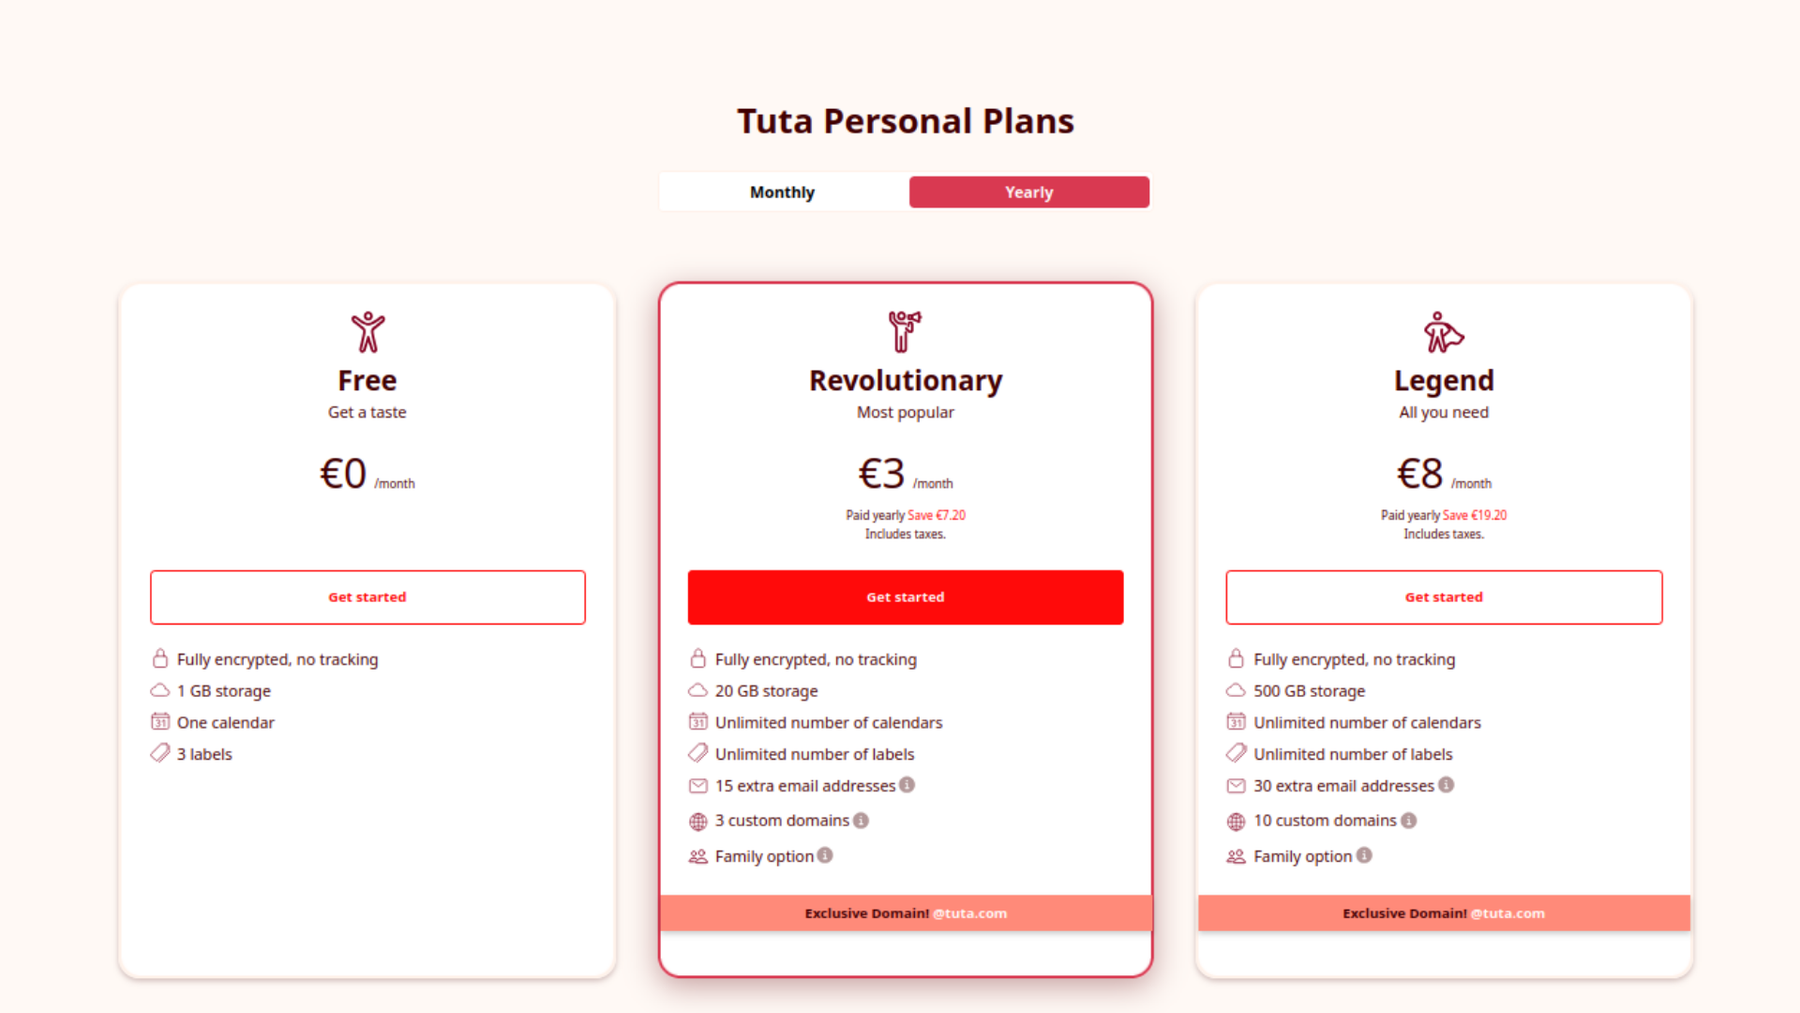
Tuta Mail offers a range of plans, but for the purpose of using email alias addresses, we’d recommend getting either Revolutionary for €3/month or Legend plan for €8 /month.
Step 2: Create alias addresses
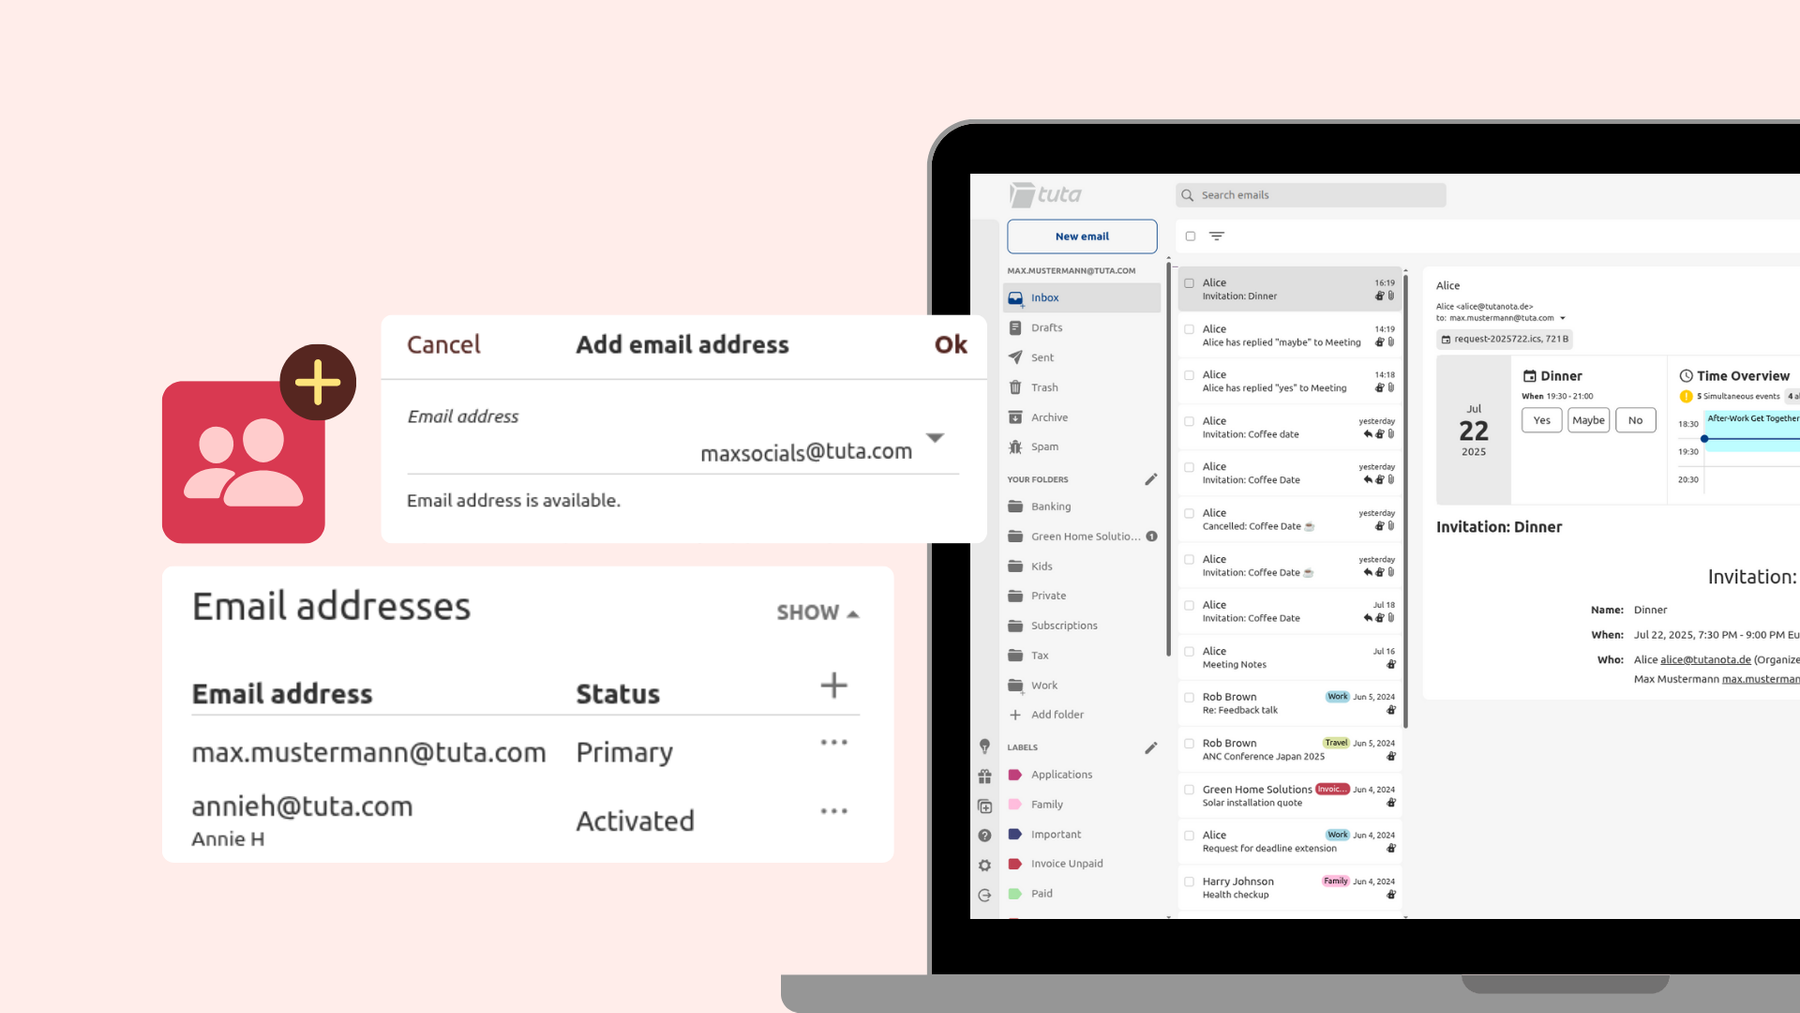

Next, you will want to think about what your important online accounts are that you’d like to update with your new email address, and if you’d like to use your primary address or an alias.
To remain private and secure, we’d recommend only sharing your primary email address with people you know. To protect your identity, reduce spam, and stay more organized, you can create alias email addresses for different purposes. Remember that you do not need to update all your accounts with your new email address - only a few important ones. For example, you might not want to update the email of an online platform that you no longer use and that most likely still sends marketing emails.
- How to add an alias address in Tuta Mail
- Settings
- Click Email
- Scroll to Email addresses and click Show
- Click on the +
- Enter your new alias address and choose the domain
- Enter your sender name
- Click Ok
🎬 Watch how to add email aliases in Tuta Mail on YouTube
Examples of alias email addresses you could create for different purposes
- Primary address: Reserve this exclusively for people you know
- An alias address for your social accounts
- An alias email address for banking
- An alias address for online shopping
- An alias address for newsletters
Step 3: Create folders
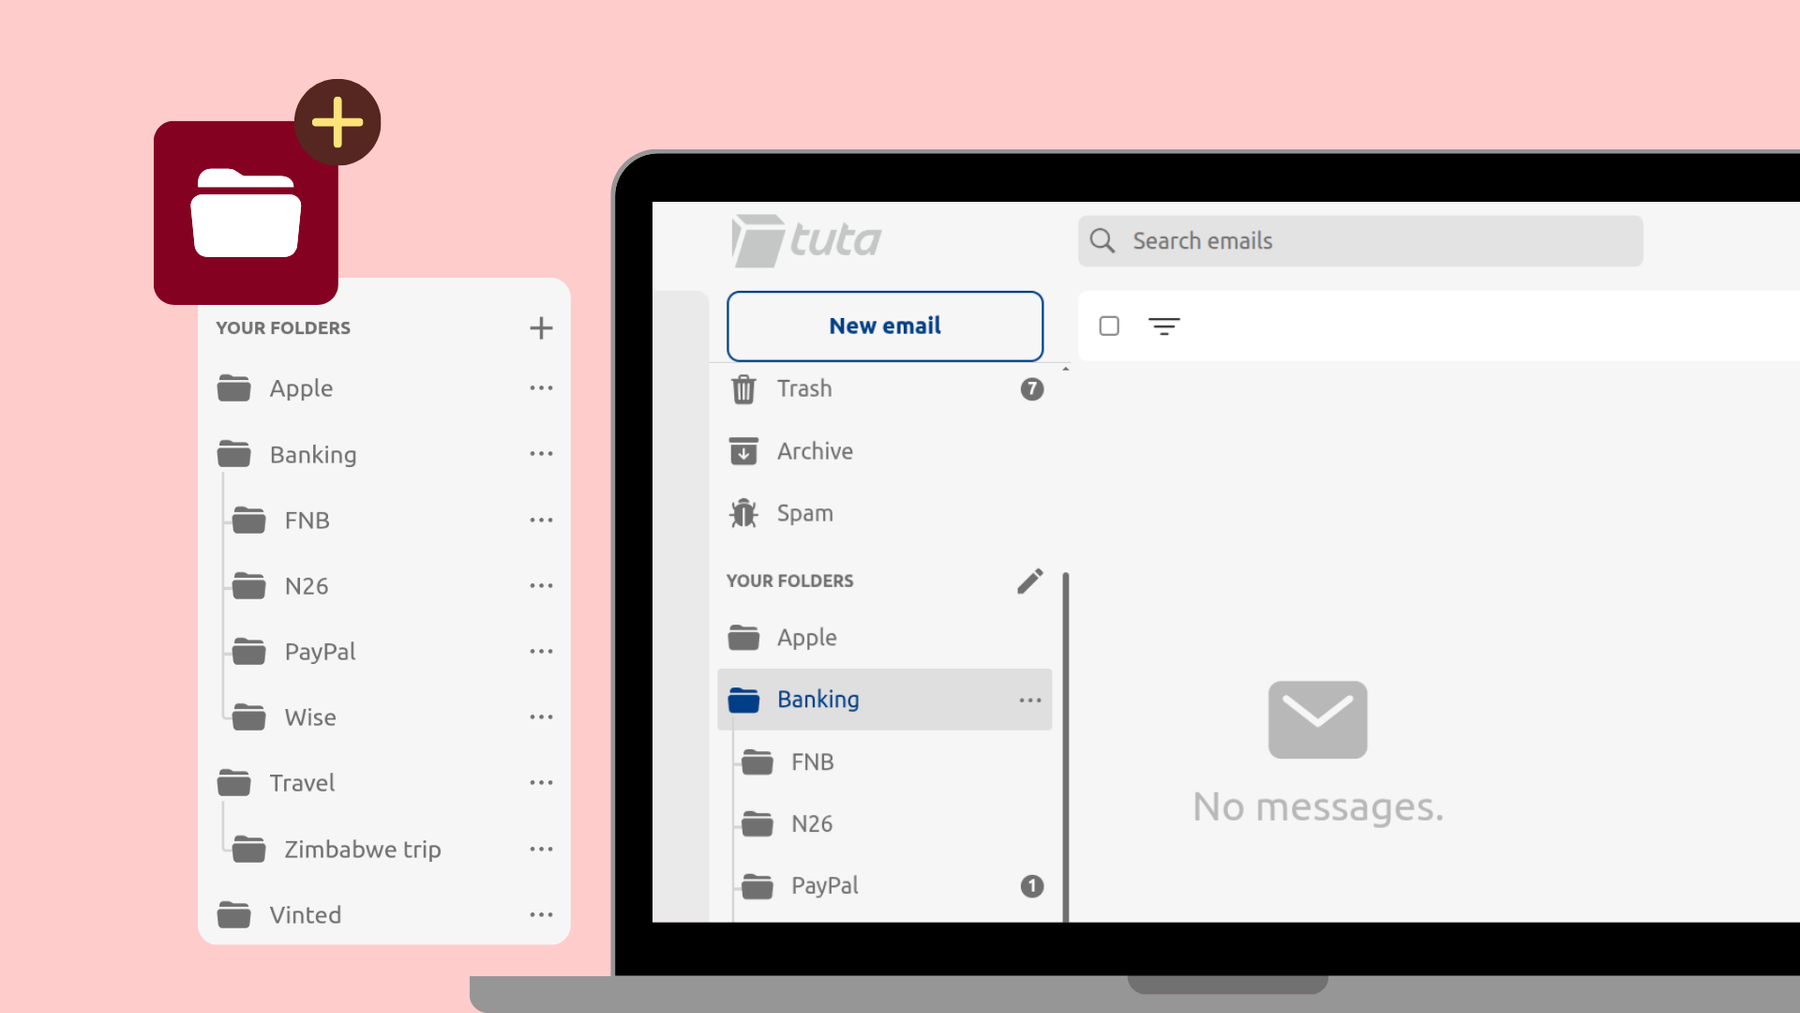

The next step is to clean up your mailbox and keep it neat and organized with the help of folders. Tuta Mail allows you to create unlimited folders, and you can create subfolders within these.
How to organize emails into folders
-
Main folder for banking - subfolders for each bank you have accounts with
-
Travel folder - subfolders for each trip or place you visit
-
How to create folders in Tuta Mail
- Click on the pen symbol next to Your Folders
- Click on the + symbol
- Enter the folder name
- Under Parent folder, choose None
- How to create subfolders within folders
- Click on the three dot menu on the parent folder
- Click on the + to add a folder
- Enter the name
- Click Ok
You can set up inbox rules so that incoming emails are automatically sorted into the dedicated folder. This ensures your inbox does not become too filled and important emails end up in their dedicated folders where you can quickly open, view, and manage them.
Step 4: Update your email address
Before you export your emails from your old account you should:
-
Let your important email contacts know about the change of your email address and ask them to update your contact.
-
Go through important profiles and accounts online, and update your email address.
For example, you could email your close friends and family informing them of your new primary address. But when you update your email address on your social media platforms or online shopping accounts, you can use one of your alias addresses.
Step 5: Export important emails
Next up you’ll need to follow the steps from your email provider to safely export your emails into either single email files (.eml) or entire mailboxes (.mbox).
-
Gmail users: Learn how to export your Gmail emails here.
-
Outlook users: Learn how to export your Outlook emails here.
Step 6: Import emails into Tuta Mail
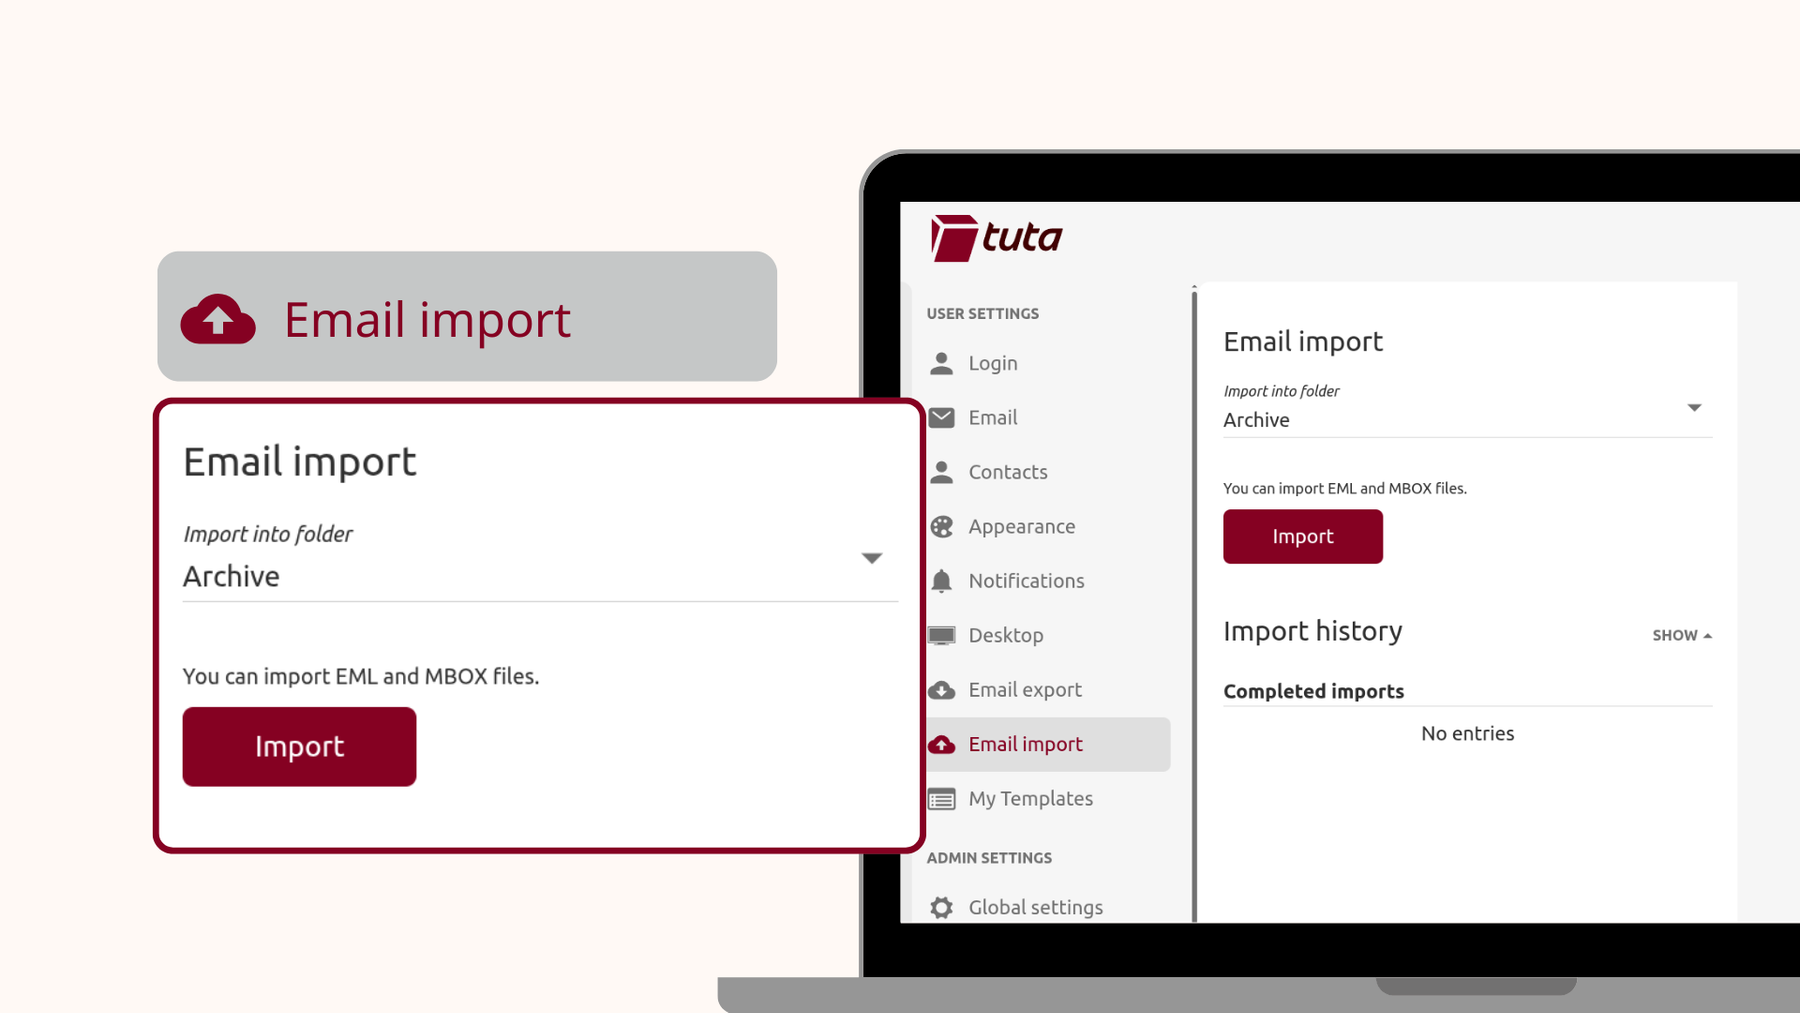

- How to import emails into Tuta Mail
- Open the Tuta Mail desktop client
- Go to Settings
- Click Email Import
- Choose a folder to import the emails to, for example, “Imported”
- Click Import
Note: For now, email import is limited to the Tuta plan Legend and Unlimited, but it will become available for all paid plans soon.
Step 7: Set up inbox rules & move emails to folders
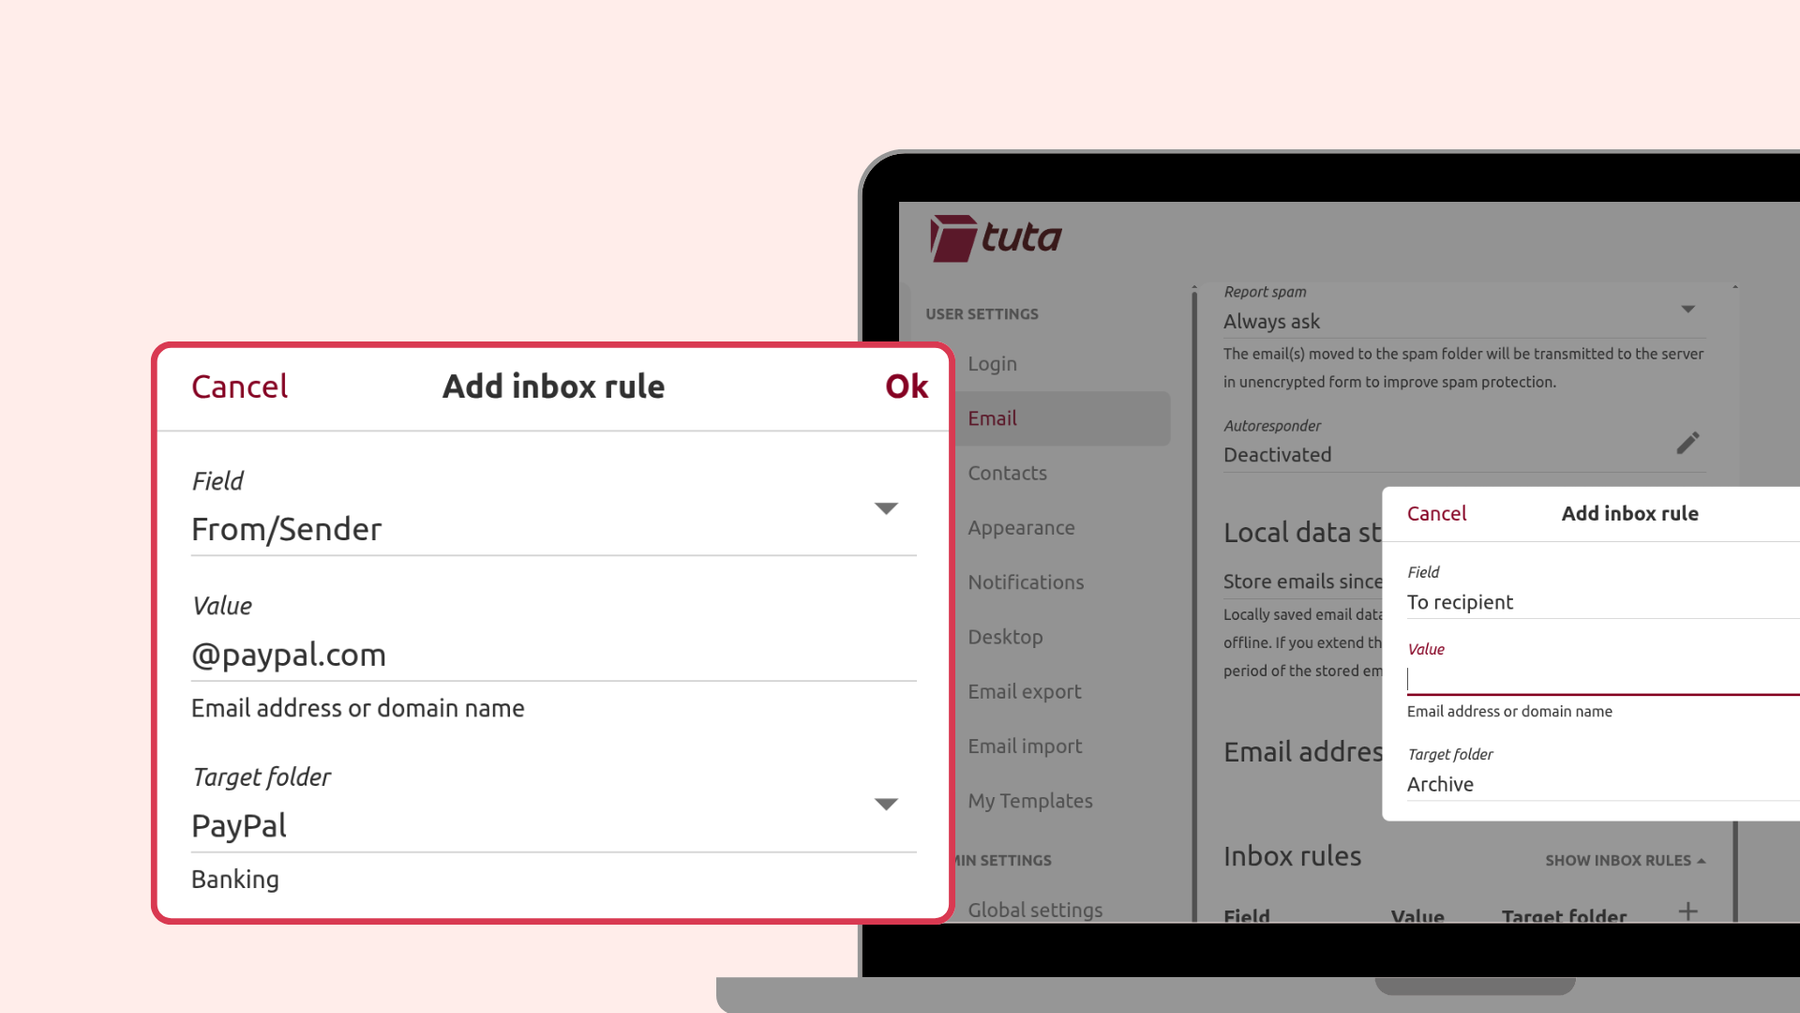

Now that you’ve imported your emails and updated your email address for your accounts, you will need to set up inbox rules. These rules allow you to choose what happens with incoming emails.
For example, you can set up a rule so that emails from the sender address containing PayPal or Barclays are sent directly into your matching “Bank” folder or subfolders. Or, you can set up an inbox rule for emails from your child’s school to always send to a specific folder.
By making use of Tuta’s inbox rules, you can set up automatic rules once and improve your email organization by keeping your emails neatly ordered in folders, without the hassle of manually moving them each time.
- How to create inbox rules in Tuta Mail
- Go to Settings
- Click Email
- Click Show inbox rules
- Click the + to add a new rule
- Under field, choose what the rule is based on. For example, the From/Sender or To recipient
- Under Value, enter the terms / address the rule is based on.
- Under Target Folder, choose which folder or subfolder the matching emails will be sent to
You can even use Regex (regular expressions) for creating inbox rules in Tuta Mail.
🎬 Watch how to create inbox rules in Tuta Mail on YouTube
- Move imported emails to folders
If you imported emails from an old email account, to improve your email organization and clean your inbox, you can also move these to their specific folders using the already set up inbox rules.
- Go to the folder containing the imported emails
- Select all by clicking the square box at the top
- Mark all as unread by clicking on the eye symbol with the line
- Click on the folder icon
- Select Inbox
The setup inbox rules will then automatically apply to these emails that have now been marked as unread. This is the case because Tuta’s inbox rules only apply to unread emails, for example, on receiving them or when marking them as unread.
Extra organization features with Tuta Mail
Utilize Labels
In Tuta Mail, you have total freedom over how you organize and categorize your emails. With Tuta’s labels, you can create custom names for each label and choose custom colors too. Emails can have more than one label, and you can view emails according to their labels.
🎬 Watch how to create and use labels in Tuta Mail on YouTube
Use the Tuta Calendar
When you sign up for Tuta Mail, you will also get access to the Tuta Calendar which is built for easy organization and effortless planning. So when leaving your old mailbox, like Gmail, why not DeGoogle completely and make the switch to Tuta Calendar - the private calendar alternative to Google - as well.
Easy control of spam
With Tuta Mail’s spam rules you’re in control of how your emails are handled with the rules you create. Spam rules allow you to set different rules for emails, saving you time and the effort of manually having to delete emails or move them to Trash or Spam. For example, you can choose where emails from specific senders, domains, or even emails containing specific words in the subject are sent to. With spam rules you can mark emails as “Not spam”, “Always spam”, or set the rule to “Discard” specific emails completely.
Auto delete after 30 days
Tuta Mail’s auto delete feature ensures that your email storage doesn’t get wasted on trash mail either, thanks to automatic deletion of all emails contained in the Trash or Spam folder after 30 days of moving the emails to these folders. You can also manually empty these folders at any time.
Beyond organization, you get privacy
More than a user-friendly mailbox that gives you email organization, Tuta Mail gives you privacy. With the German email provider, Tuta Mail, you’re guaranteed the best privacy and security thanks to its post-quantum encryption, open source code, and zero-knowledge architecture.
Learn more about why Tuta Mail is considered the most secure and privacy-focused email provider!

